by PAS CEO | Oct 28, 2023 | Blog
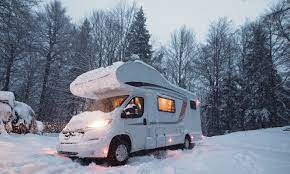
As it gets a bit cooler outside, your RV is going to need some protection from the cold weather. This is because water notoriously expands when it freezes. This means it can lead to leaking or bursting pipes in your RVs water supply. You want to winterize your RV so that the water in it is replaced with antifreeze, which will remain in liquid form even at colder temperatures.
Save some money this winter by winterizing your RV yourself. You can do this with the following supplies:
A few gallons of marine/RV antifreeze—exact amount varies by make and model
A water-heater bypass kit if not already installed
A cleaning wand (see #2 below)
Water pump converter kit or tubing to connect to pump inlet valve
Hand tools to remove drain plugs
A bucket
STEP 1: GET RID OF WATER FILTERS
As an RV, the first thing you need to do is remove or bypass any inline water filters because antifreeze can damage them. As you work on the filters, see if they need replacement. If you do need to replace them, you have all winter to find new filters at the best price.
To obtain these filters, you’re going to need your owner’s manual.
STEP 2: DRAIN THE TANKS
Then you want to drain the freshwater holding tank. To get to this tank, you have to know that it is accessible below your RV near an exterior wall and is usually centrally located so that it can deliver water to sinks and showers. Just locate the valve and open it. It is okay if it drains onto the ground, though if you are in an RV park your neighbors may not appreciate it.
Then, you want to find the drain plugs or valves for the black and gray water tanks. These tanks are usually by the exterior wall underneath your RVs bathroom. The drain valves should be easy to locate from there.
If you allow waste-water to remain in those for an extended period of time, this not only increases the risk of water freezing, but it lets potential harmful bacteria grow unimpeded. The tanks for black and gray water should only be drained at an approved dumping facility. Your drain hose should be properly attached at both ends before you start draining. It’s an easy mistake to make, but one you’ll instantly regret.
Drain the black water tank first. If your RV does not have its own tank-flushing system, you can utilize a cleaning wand to flush the black water tank. Products like Flush King also help flush out both waste-water tanks. When you’re done, it assists in lubricating the termination valves with WD-40 for future use.
Draining the black water tank first allows the gray water to flush out the drain hose, keeping it cleaner for future use and storage.
STEP 3: DRAIN WATER HEATER AND LINES
DRAINING THE WATER HEATER
The water heater should not be hot or under pressure when it is drained. Be sure to shut the water heater off and let it cool. You don’t want to be burned.
There could be different places to turn off your water heater. It’s best to turn them all off. One power switch is on the water heater itself, accessible from the outside of the RV. The other is on or near the control panel in your RV.
The next step is to stop the water that is going into the water heater. Usually there’s a valve within a foot or two of where the pipe or hose enters the water heater.
Now, can open the pressure relief valve. Wait until water stops running from the PRV before moving on, and leave the valve open.
At this point, get a bucket. It’s crucial because it’s time to drain the water heater.
While it’s draining, check the water in the bucket for rust, sediment, or scaling. If you see these things, you might want to flush your water heater again, replace your anode rod, or start saving for a new water heater.
STEP 4: DRAINING YOUR RV’S WATER LINES
Open all faucets and locate and open the low-point drain plugs on the system. Flush the toilet to remove water in the tank. If you have an outdoor shower, be sure to drain it as well.
Once the water is drained, you need to recap all the drains and close all faucets.
STEP 5: BYPASS THE WATER HEATER
You’re about to add antifreeze to your plumbing system, but filling your water heater would waste six to ten gallons of antifreeze. It makes the dewinterizing process more difficult if the hot water tank isn’t bypassed.
Many RVs come with a bypass installed, but if yours doesn’t have one, visit an RV repair facility to have one installed.
STEP 6: ADD ANTIFREEZE
Now you need to pump the antifreeze in your system. This will help you when your plumbing when the thermometer dips below freezing. There are two ways to do this:
- You can put in a water pump conversion kit
- You can utilize the inlet side of the water pump
Water pump conversion kits will come with details on their instructions on how to use them. If using the inlet side of the water pump, disconnect the line coming from the freshwater tank and attach tubing that connects to the inlet. Put the other end of the tubing into a container of non-toxic marine/RV antifreeze. Then turn on the pump, which will pressurize the plumbing system.
Starting with the closest faucet to the pump, slowly open the hot and cold faucets until antifreeze comes out. Once you see antifreeze, close the faucet. Do this to all faucets, working from closest faucets to pump to the farther faucets. As you pump antifreeze through the water lines, you may need to replace the antifreeze container. Don’t forget the outdoor shower.
Next, be sure to flush the toilet until antifreeze appears in the bowl. Introduce antifreeze into the drain lines and holding tank, so pour a cup of antifreeze in each drain and into the toilet bowl. Flush the toilet.
Now, it’s time to turn the water pump off. You’re going to open a faucet to release the pressure in the system. Go to the city water inlet valve. Remove the small screen and push on the valve with a screwdriver until antifreeze comes out. Replace the screen and close the inlet. Double check that the water heater’s heating element is switched off and that all faucets are closed.
STEP 7: ADD DAMPRID SPILL FOR MOISTURE COLLECTION
Now that you’ve made it this far, you’re going to add the DampRid Spill For Moisture Collection inside the RV to prevent mildew and moisture and mold inside over the storage period. This will maintain your upholstery and walls, otherwise you risk odors and dampness when you return to get your RV.
STEP 8: THE BATTERIES
With you intending your RV to sit for several months in cold weather, you need to take out the battery and bringing it indoors can extend the life of an auto battery and help it keep its charge.
Batteries should be placed in storage in a place that is warm, dry place, with something underneath them in case they leak (cardboard or any sort of mat works well). Some recommend using a battery maintainer to help the battery keep it charged.
RV WINTERIZATION COMPLETE
Your RV is now ready for winter!
While you are winterizing your RV, you may find some issues with your RV that need to be addressed. In the past, many RVers used RV repair shops almost exclusively unless their RV was disabled. These days, however, RV service centers are overburdened by the high number of RVs in need of repair. We hope you enjoyed these steps from PDX Auto Storage to get the info you needed to winterize your RV.

by PAS CEO | Oct 25, 2023 | Blog
Are you looking for a place to park your car or truck for a significant amount of time? Whether you’re traveling or you simply need a place to park, here are some useful services that PDX Auto Storage offers its customers.
1. Maintenance Starts
We at PDX Auto Storage helps to keep engine seals lubed so they do not dry out across long periods of dry storage. We also aim to prevent battery failure over time that tends to happen with lack of maintenance and long-term storage.
2. We Offer Jump Starts
If you find yourself with a dead battery due to prolonged storage, we’re there for you. Over time, batteries become weak and tend to fail to start your car. This is because of cold weather and long-term storage. With the Service plus package you can rest assured your battery will be charged and ready to start your unit when you return to pick it up.
3. We Provide Detailing & Vacuuming
We have an excellent standard of cleanliness, and as a result, our whole unit is wiped down, floors are vacuumed, and we put new clean paper floor mats on your floors to ensure you return to a comfortable clean car after your long-dreaded flight.
4. We Check/Top-off Tire Pressure
It is a fact that tires are known to deflate with seasonal and weather temperature changes and can eventually need to be topped off. Therefore, we check and assure tire air pressure is topped off to prevent low tires upon your arrival from a long flight.
In closing, we know that the last thing someone wants after a long flight is to come back to a dead battery, or low or flat tires, especially if you still have a long drive ahead of you to arrive at your final destination. Therefore, we assure that you will come back to a clean car, tire air pressure checked and topped off, with your battery charged and your car waiting for your arrival Call 503-257-1140.
by PAS CEO | Oct 25, 2023 | Blog
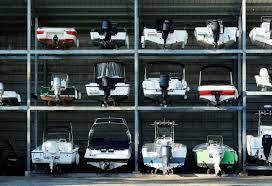
Maintaining your boat during the winter months may be a struggle, especially if you’re a new boat owner. However, this kind of upkeep is necessary so certain parts of the boat don’t get destroyed. Keep reading to find out how to winterize your boat, courtesy of PDX Auto Storage.
- Change the Engine Oil
The last thing you want is old oil sitting in your engine for a long time. What happens is that acids that are in the oil can corrode engine parts while the boat is stored. This means that it is wise to put on a fresh and clean supply before leaving it. Be sure when you do this, warm up the engine and get out as much oil as possible before replacing it.
- Be Sure to Fog Your Engine
Making sure your engine is fogged is a crucial aspect of winterizing your boat. To do this, what you need to do is spray a protective coating of oil over the internal engine parts. This helps protect them from moisture so you can avoid any corrosion on the parts.
- Be Sure to Get Rid of Water from Your Engine
A lot of the newer marine engines use an enclosed cooling system. With these, there is a small tank on the top of the engine that uses a combination of fresh water and coolant. This fresh water is circulated through the engine and through a heat exchanger. The fresh water then absorbs the heat of the engine.
Do NOT make the mistake of getting water in your engine. This is because when water freezes, it has the power to mess up engine components. To effectively winterize your boat, this means you’ll need to get rid of water from the engine. It doesn’t matter what type of engine you have. To do this, you should follow your engine owner’s manual when taking this step and ask for extra advice from PDX Auto Storage if need be. Another effective method for winterizing raw water-cooled systems is to run the engine and pump antifreeze into the block. Click here to read more.
4. Add Fuel Stabilizer
Draining the fuel from an engine alone isn’t enough to make sure the engine won’t erode during the winter. Did you know that there is always some fuel in the tank, even when it’s technically empty. You want to fill the tank with fresh fuel and provide fuel stabilizer to it. This will help prevent the fuel from deteriorating, which will mess up your boat.
5. Be Sure that the Boat Is Thoroughly Cleaned
After handling the engine and its components, you need to move on to the net level of winterizing a boat. You must get in there and be sure to clean your boat before you leave it for the winter. This is because any dirt or stains may worsen if they’re left for several months. This means you should clean everything from the seats to the flooring, to the trim.
6. Go Ahead and Replace Your Gear Oil
There is more work than just changing your oil in your engine. You must replace the gear oil. Simply drain the old oil out of the compartment and replace it with a fresh supply. This is a crucial step in winterizing your boat because the new gear oil will help protect your transmission from moisture and corrosion.
7. Lubricate Your Grease Fittings
Finally, it is good to know that rust and corrosion are a huge threat to many parts of your boat, especially its grease fittings. This means that if you use a high-quality brand of marine lubricant to coat them, that should protect them over the winter months. If you can’t find your boat’s grease fittings, look at your owner’s manual or ask at PDX Auto Storage for some advice.
To find out how else you can winterize your boat, talk to the experts at PDX Auto Storage. We can help you store your boat as well as give you additional tips on maintaining your boat during the winter. Contact us by phone or on their website here.
by PAS CEO | Oct 22, 2023 | Blog
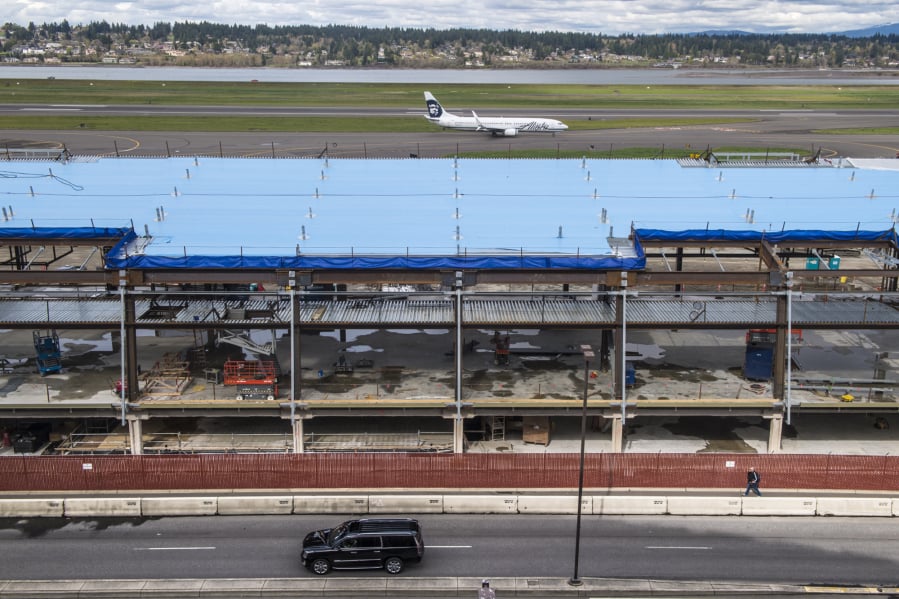
When you’re planning a vacation, the last thing you want to worry about is having your car stolen. You may think your car is safe at Portland International Airport, but it’s not. As of this year of 2023, over 54 cars have been stolen from the Portland International Airport. This was not only extremely frustrating and inconvenient for those who had trusted that their cars would be safe, but also emotional. When you’re on vacation, you don’t want to come back to another situation that is going to cost you money when you need to get back on with your life.
In the past 5 years, Portland International Airport parking has doubled in theft. This is a statistic one shouldn’t accept. You deserve a quality space that makes sure your car will be protected and a space that has more control over who’s coming in and out of the space. The people that have been affected by this have been devastated. Don’t be another statistic. Use PDX Auto Storage for better protection. THIS IS NOT TO BE CONFUSED WITH PDX INTERNATIONAL AIRPORT.
And if that isn’t enough, there are additional reasons why one shouldn’t park at Portland International Airport. They don’t offer many of the same features that Portland International Airport has. The airport doesn’t put air in your tires, vacuum the interior, and essentially doesn’t make sure your car is in the best condition possible when you return.
So if you’re like one of the million Americans that has a very reasonable request- which is for your car to be there and safe and not broken into when you return from a flight, choose PDX Auto Storage. It’s been in business for 25 years, has great ratings, and provides shuttle assistance to the airport, which is simply 7 miles away. It’s better to be safe than sorry, so try PDX Auto Storage today!
by PAS CEO | Oct 22, 2023 | Blog
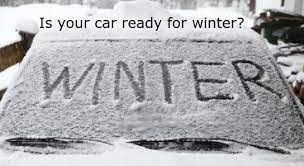
When it comes to PDX Auto Storage, we don’t only store vehicles- we also act as a resource for the community. This is why we are giving you five useful tips on storing your vehicle this winter. There are some things you’re going to want to do in order to maintain your car’s condition as the holiday season unfolds. Here are some things to take note of:
1. TIRE INFLATION
Before you put your car away for the winter, it is best to check and top off your tire air pressure. This is because tires tend to deflate over time, and weather temperature fluctuations can increase this issue. When the temperature changes, so does the air pressure in your car tires, causing them to deflate over long periods of time.
Without tending to this, one can expect auto repair costs. As tires deflate, they can end up causing a lot of damage to the tires by damaging the rubber from sitting on the wheel, tires crack, loose air pressure and become unsafe to drive on.
This leads to costly repairs when it comes time to use your car again as tires need replacing and don’t come cheap. Prevent this problem by using these simple little storage hacks to prevent unnecessary and unwanted repair costs and frustration.
To learn more about how weather can affect your tires, check out this post. You can also talk to us experts at PDX Auto Storage
2. ANTIFREEZE
Antifreeze is used to prevent the engine from freezing and cracking your engine block radiator and hoses. This can cost as much as thousands of dollars in unexpected costly repairs. When putting antifreeze in your car, it is usually mixed 50% with water. However in the winter, you might want to go with 60% antifreeze and 40% water. Note: We do not provide antifreeze at our facility. To ask more about using antifreeze, contact us at PDX Auto Storage at (503)257-1140.
3. MOISTURE CONDENSATION COLLECTION BAG:
A Damprid moisture condensation collection bag helps to reduce and even prevents moisture and condensation buildup inside your car / truck. This causes musty odors mold and mildew in bedding your car’s interior and upholstery, due to prolonged winter storage.
4. REGULAR MAINTENANCE STARTS:
Maintenance starts also help on overall performance by keeping your car’s battery active occasionally, this simple little trick can also assist in saving much unexpected and unnecessary added repair costs. Auto batteries like everything else tend to expire over time, but this little trick can also help to reduce the headache of unwanted auto repair costs.
By starting your engine every couple months you help to keep the battery alive, so they do not go dormant and lose their starting cranking power over the winter cold months, causing the need to replace your battery in spring.
5. FITTED CAR COVER
A properly- fitted car cover that fits your car properly can also help with winter Auto Storage protection. By using a fitted car cover to your specific model, this helps with additional weather protection, helps against sun fading due to long exposure to the sun over extended periods of time, as well as nasty winter weather elements. This helps to prevent seats and dashes from weathering and drying out cracking and fading due to the UV Rays, causing repairs and additional costs.
In conclusion, by supplying a quality fitted car cover, having your antifreeze and tires checked, and parking using the PDX Auto Storage service plus package, you will have an additional piece of mind that your car has additional protection against the winter weather elements.